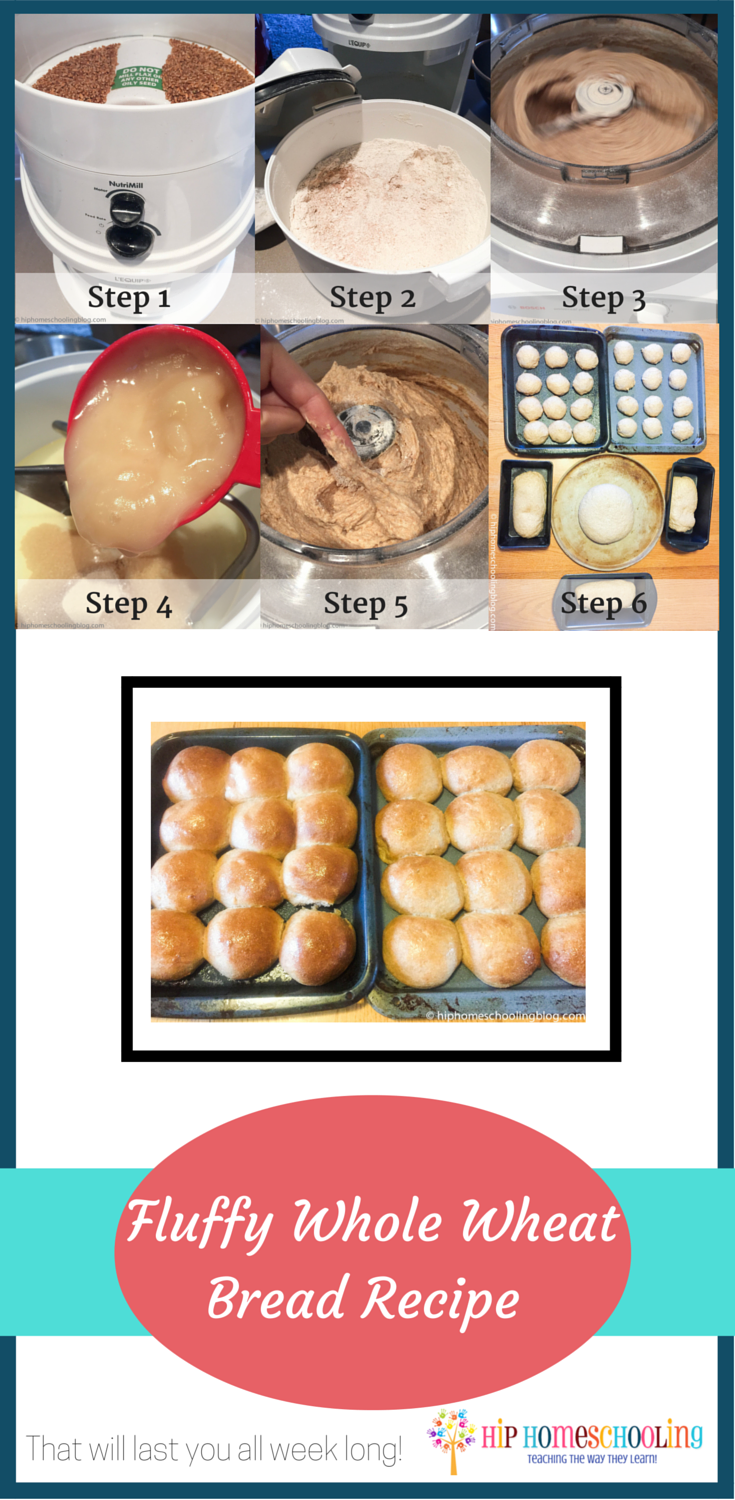
I have had my Nutrimill and Bosch mixer for about 4 years now and every time I use them I kick myself for buying store bought bread. Nothing compares with the fluffy, naturally sweet and nutty flavor of fresh milled flour. I am going to show you the recipe that I made for our once-a-wake baking day. This recipe is relatively simple and I am going to include a TON of step-by-step pictures so you can see just what the dough should look like, how sticky it should be, what vital wheat gluten looks like, and more! This will be the most detailed recipe you’ll have ever read!
PIN ME!
Whole Wheat Bread Recipe Step by Step.
If you have a wheat grinder, you can start by grinding your flour. Make sure you are using your finest flour setting. My mill takes about 10 minutes to do a full 15 cups of flour, so make sure you account for your milling time.

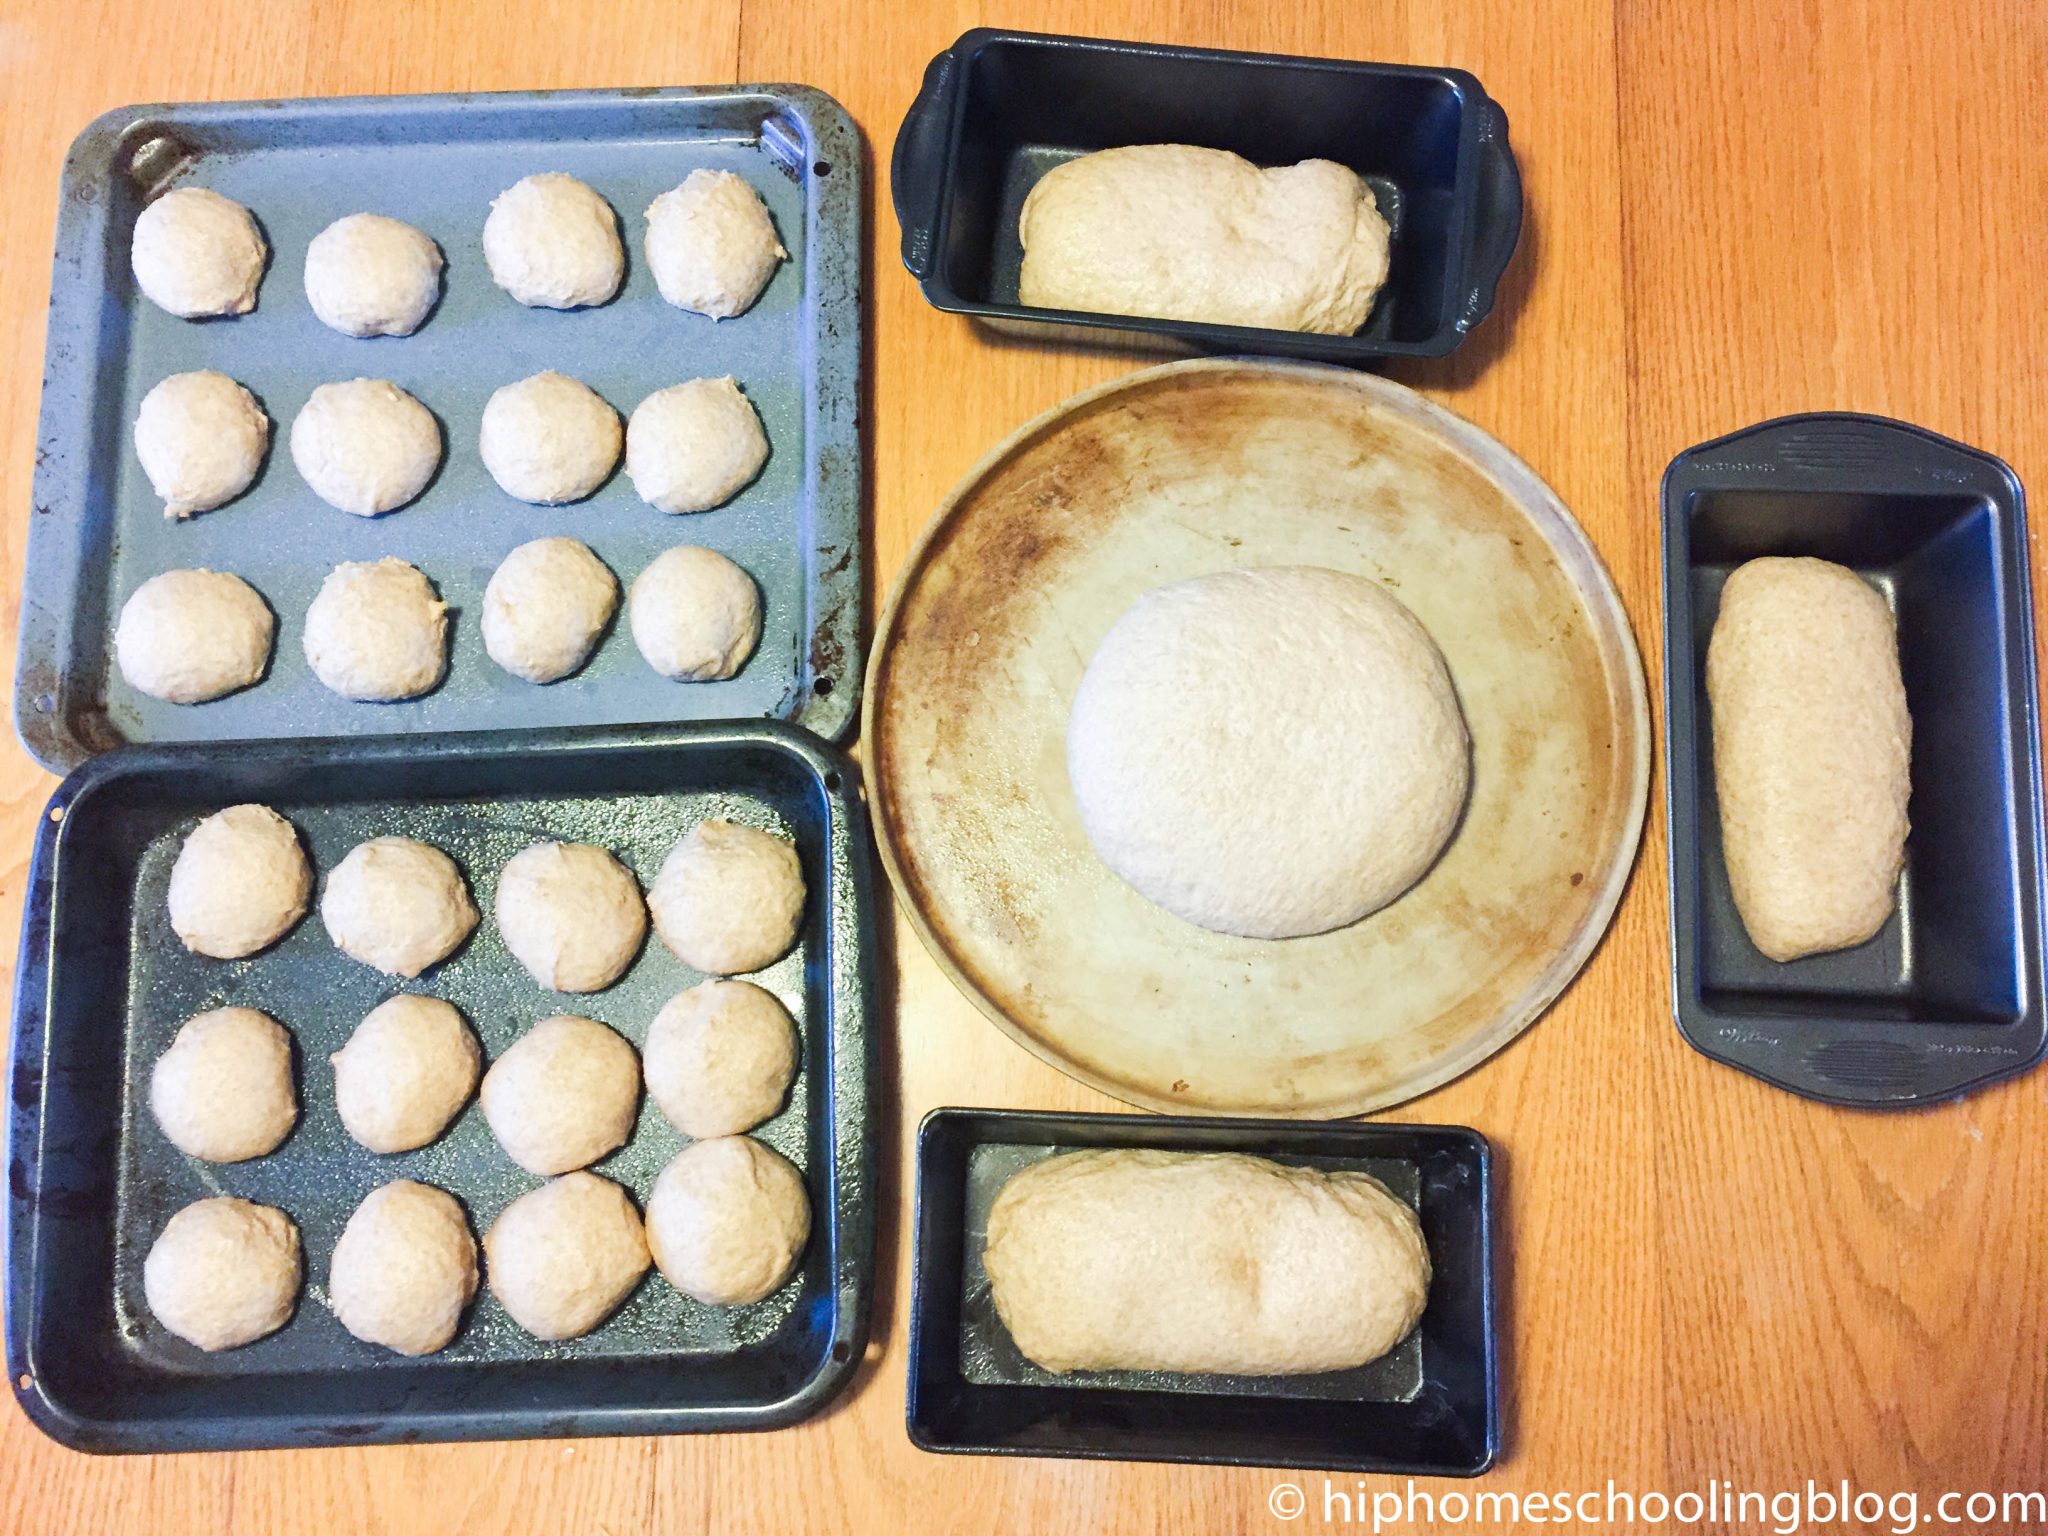
Once you have your flour, you are ready to start adding your ingredients. The recipe card is at the bottom of this post with easy check boxes that you can actually check off right in this blog post to keep track of what you have used. Please note this is a very large recipe, enough to make 2-3 pans of buns and 4-5 loaves of bread in one batch.
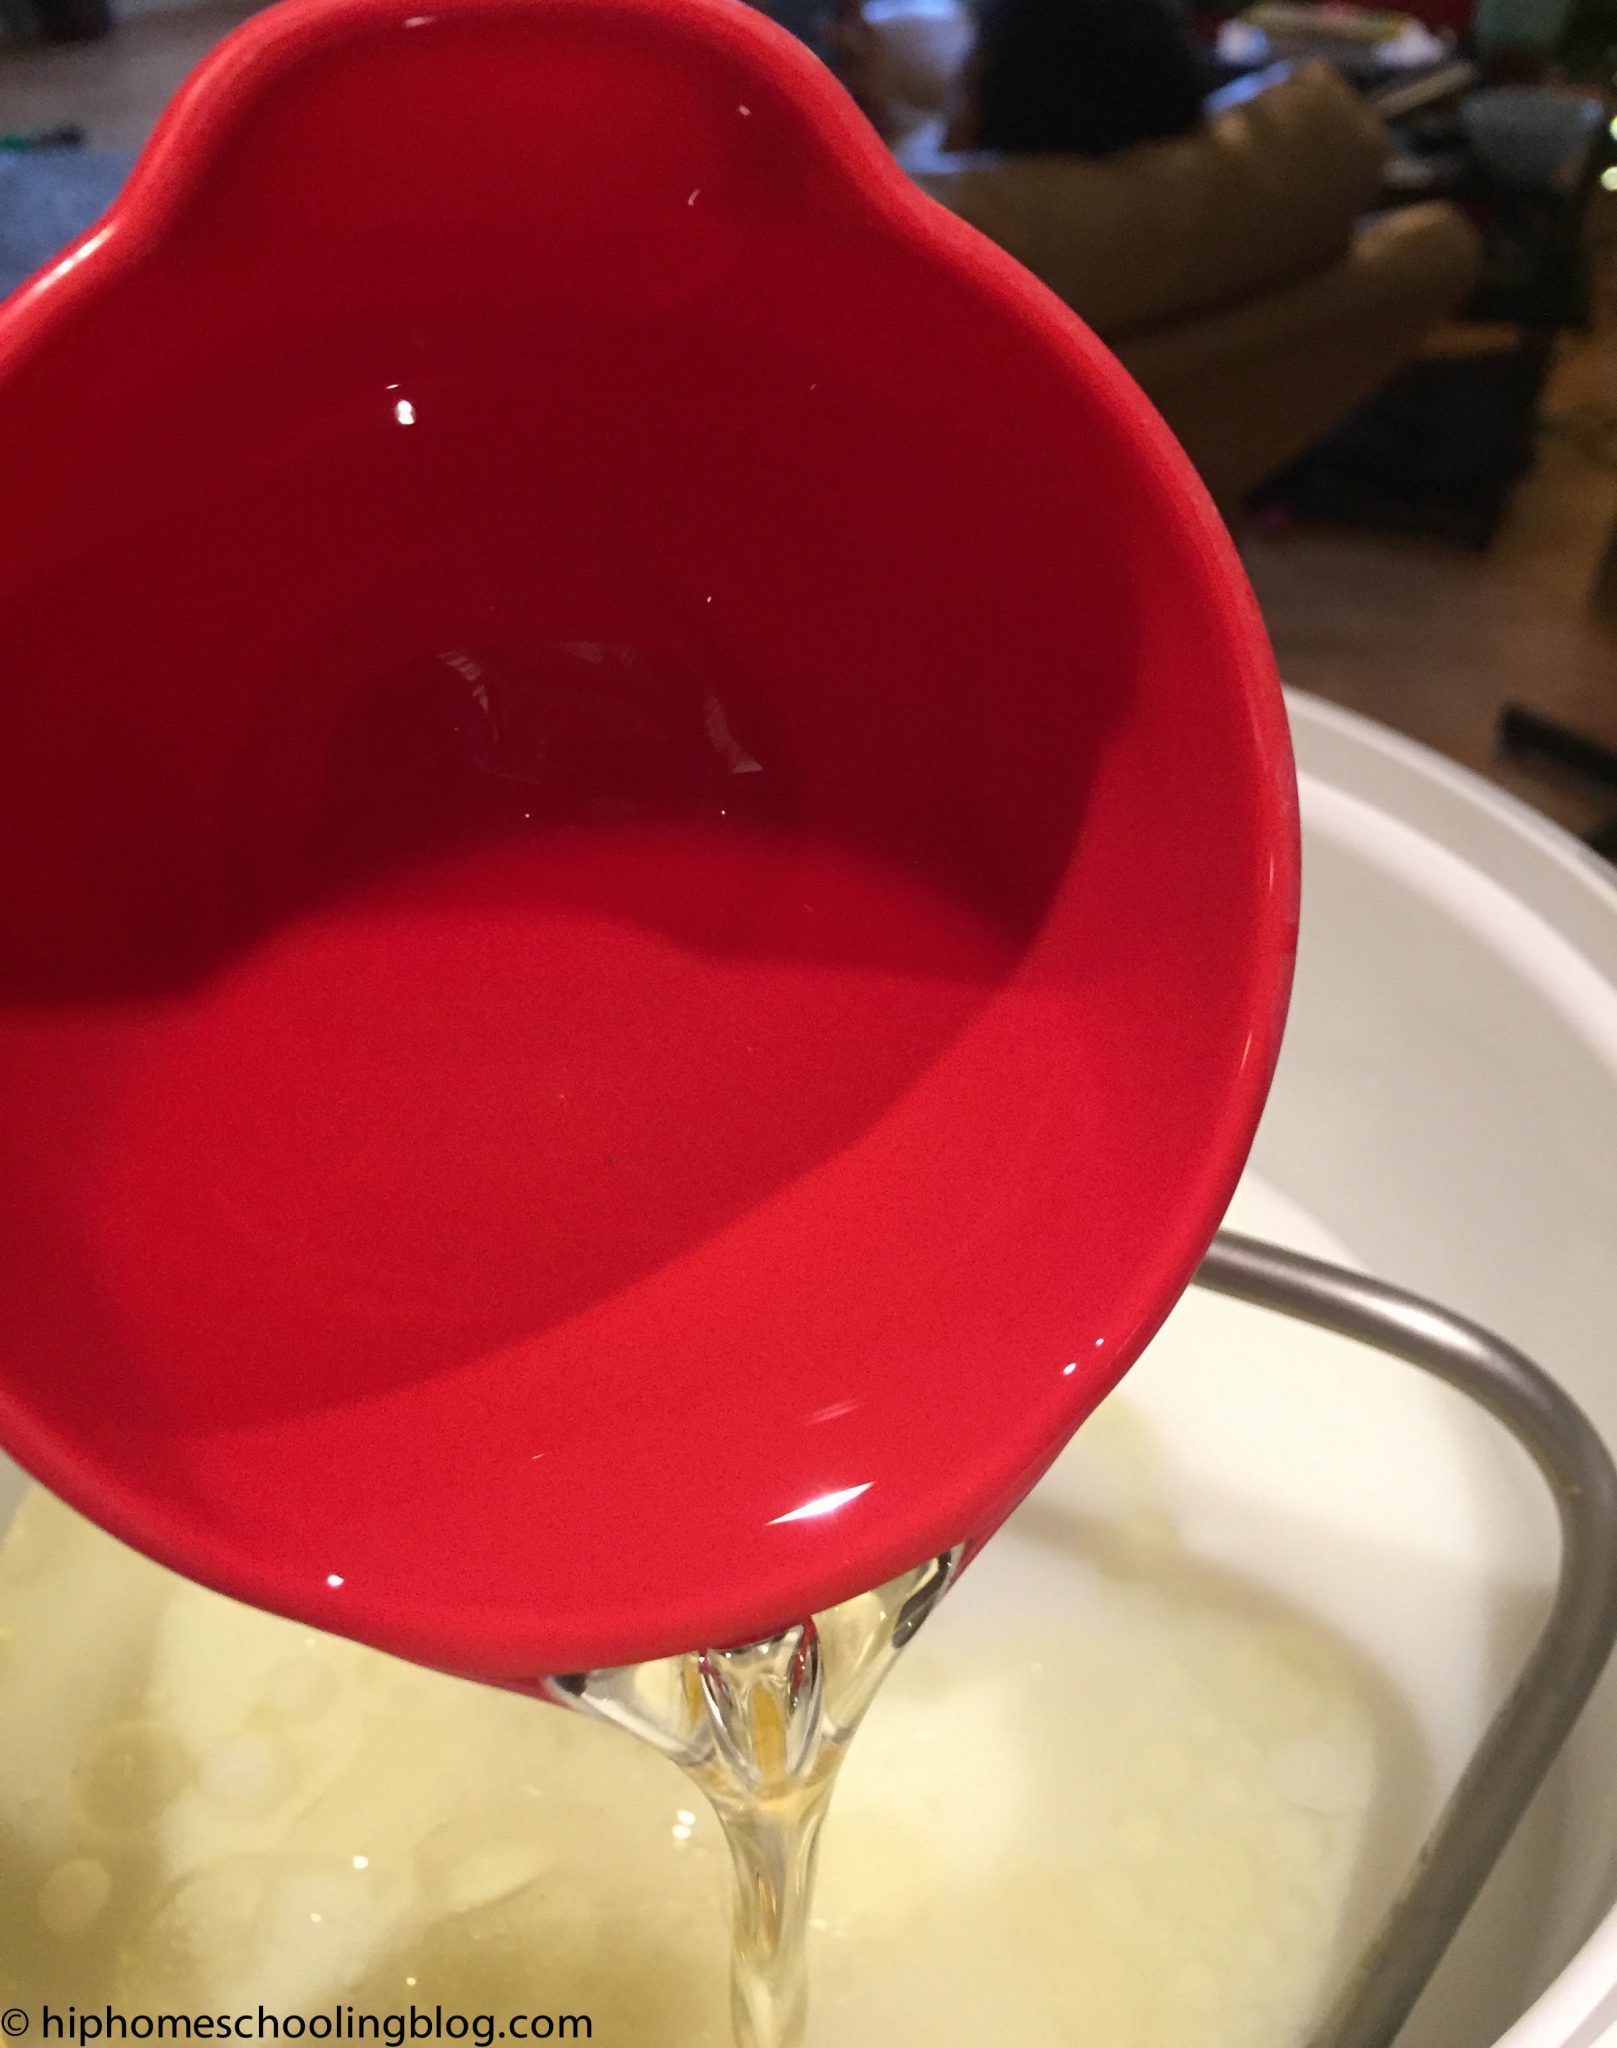
I always add my oil before my honey. If you are using liquid honey it will separate cleanly from the measuring cup. This time I used creamed honey and wasn’t as successful, but it still was much cleaner than scraping it from the cup.
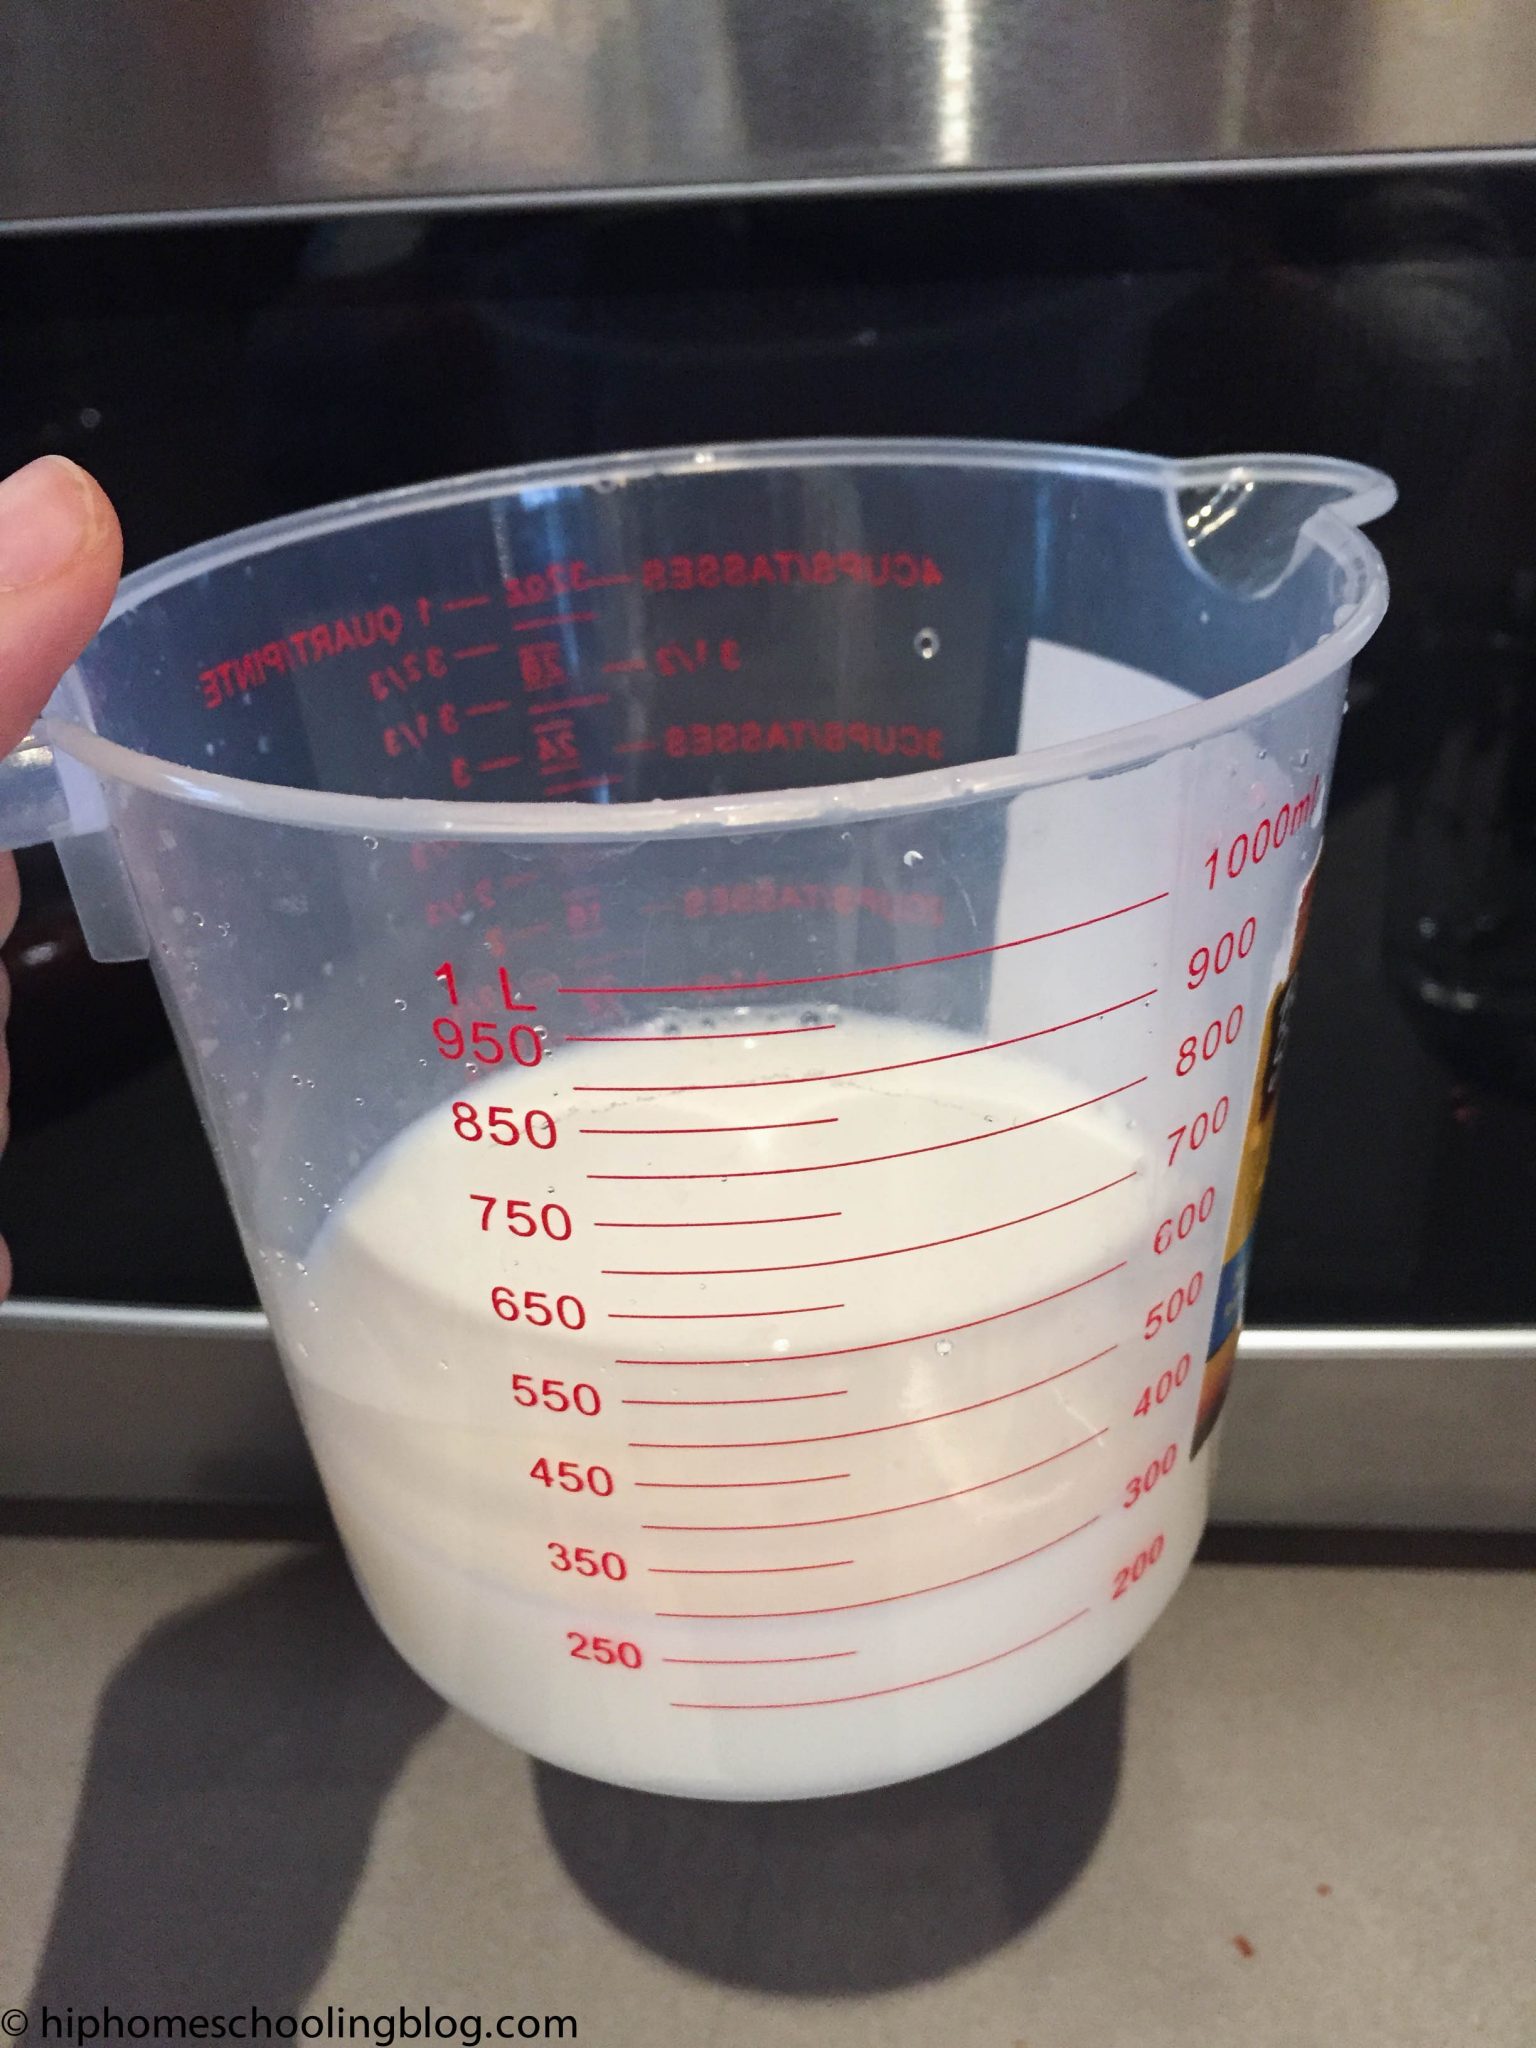
I put my 1 cup of milk in the microwave for about 40 seconds to give it a light scalding before adding it to my mixture. This helps it rise a little faster and keeps the dough warm.
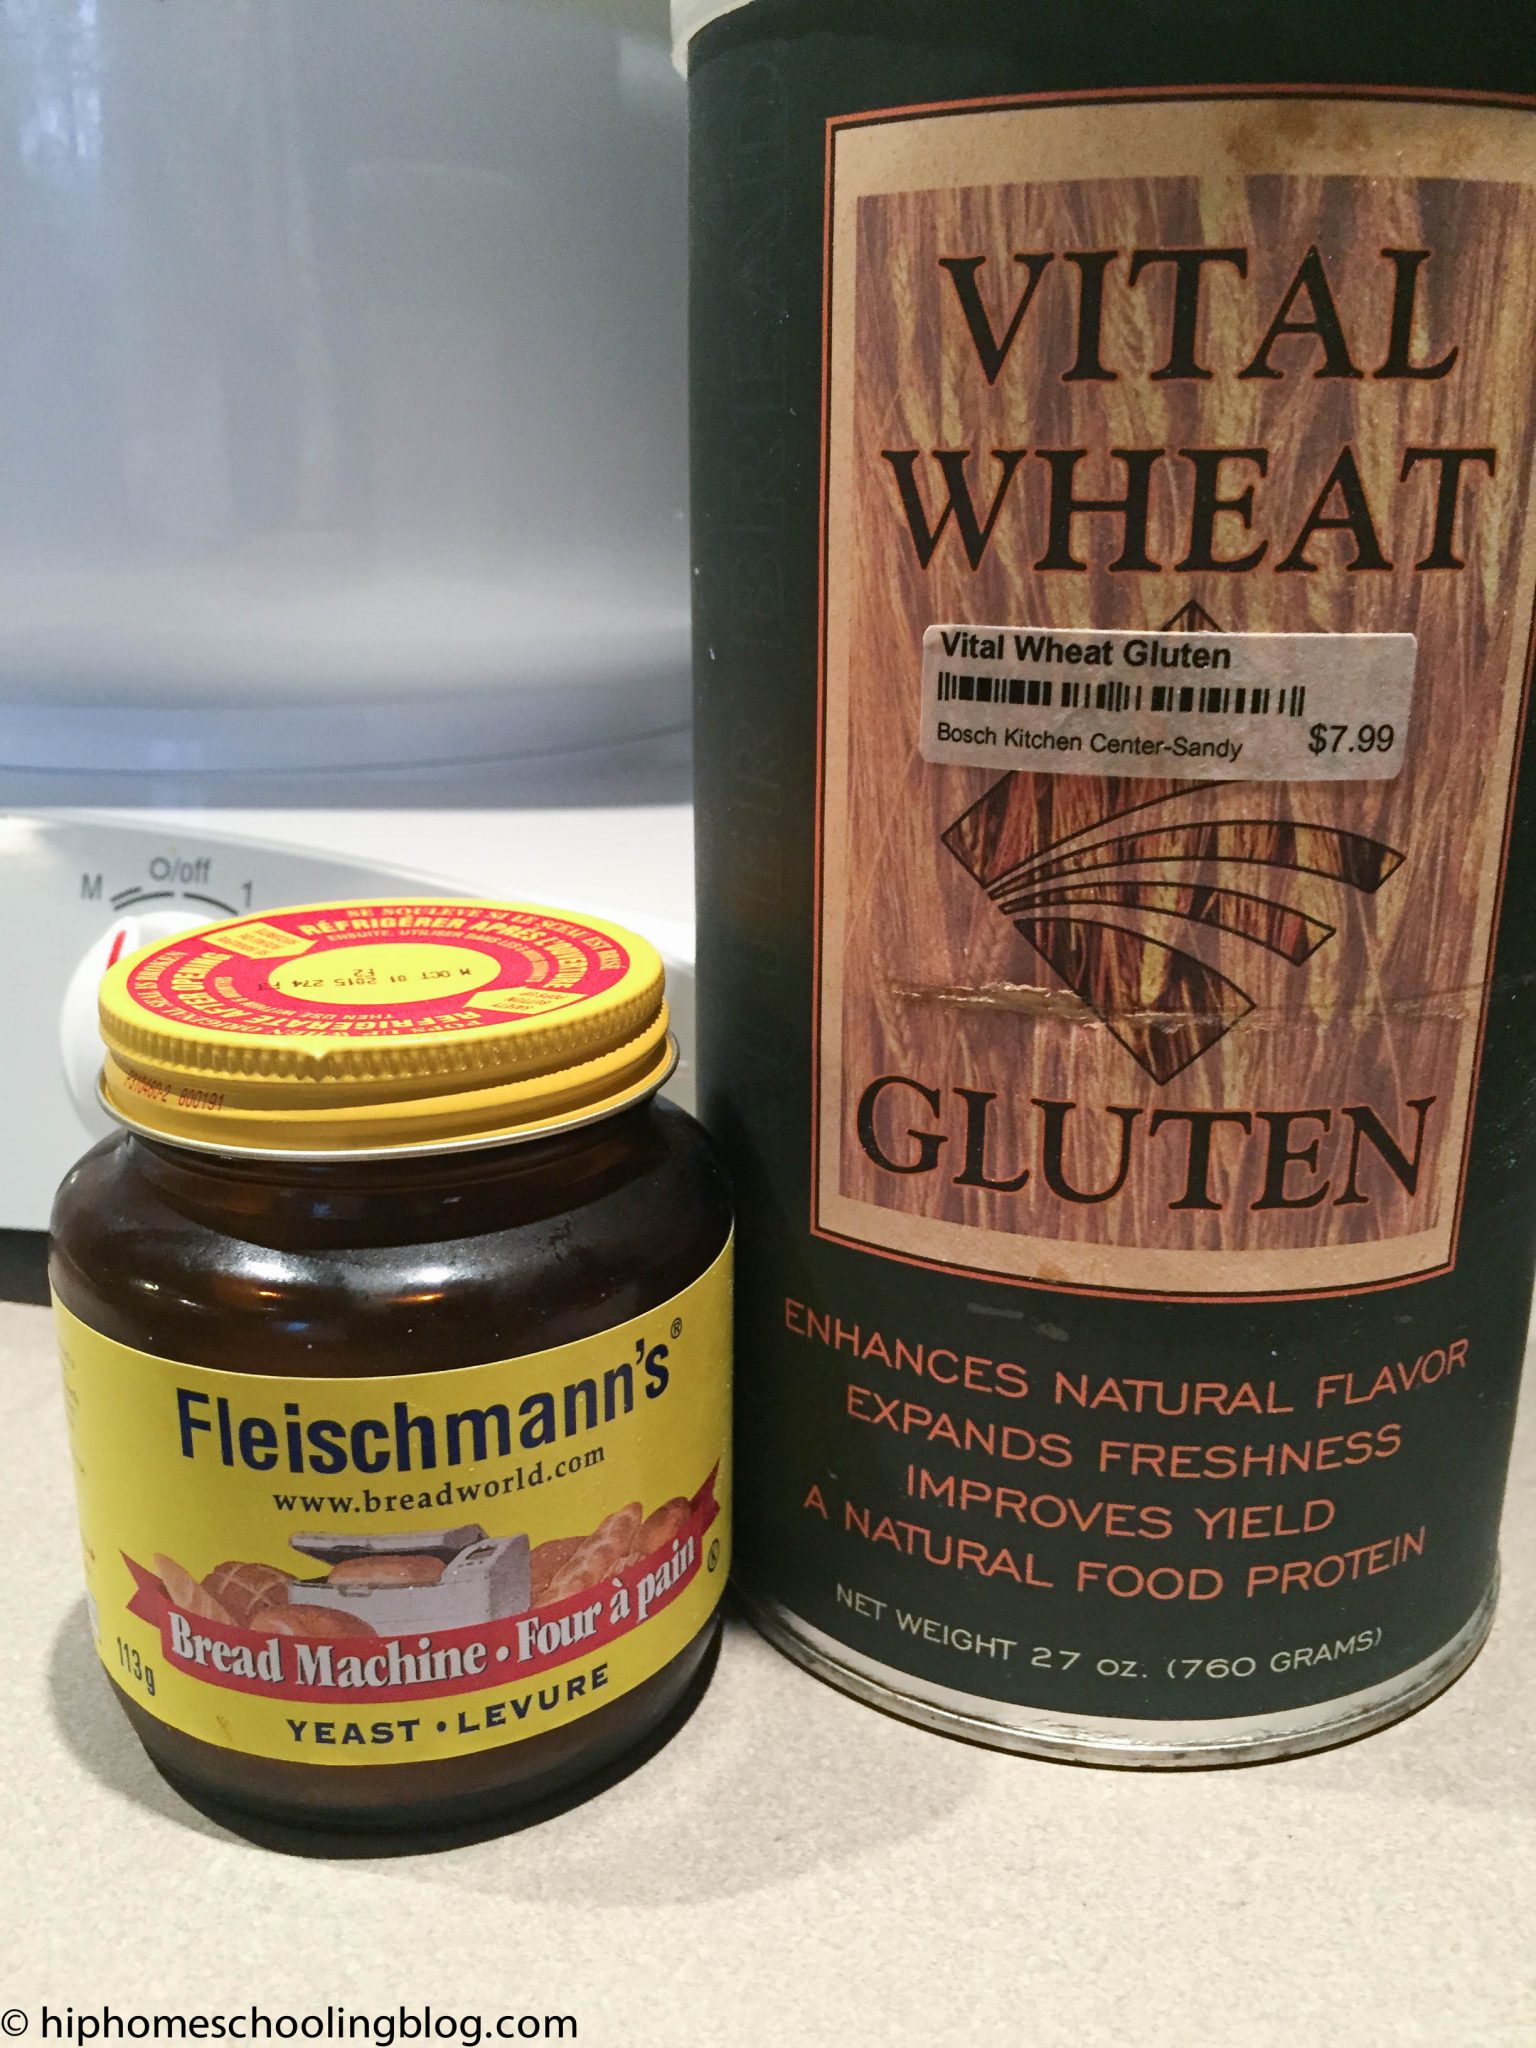
When you are working with freshly ground flour, the dough has a natural tendency to be quite dense. To combat this, many bakers use vital wheat gluten. It helps the bread rise more thus making a lighter, fluffier bread. If you are using store bought whole wheat flour, this is not necessary (or if you don’t have any on hand, you can still make this!). I took a picture of the yeast as well as most people just say add yeast but I never know which one. Any quick rise yeast will work for this recipe.
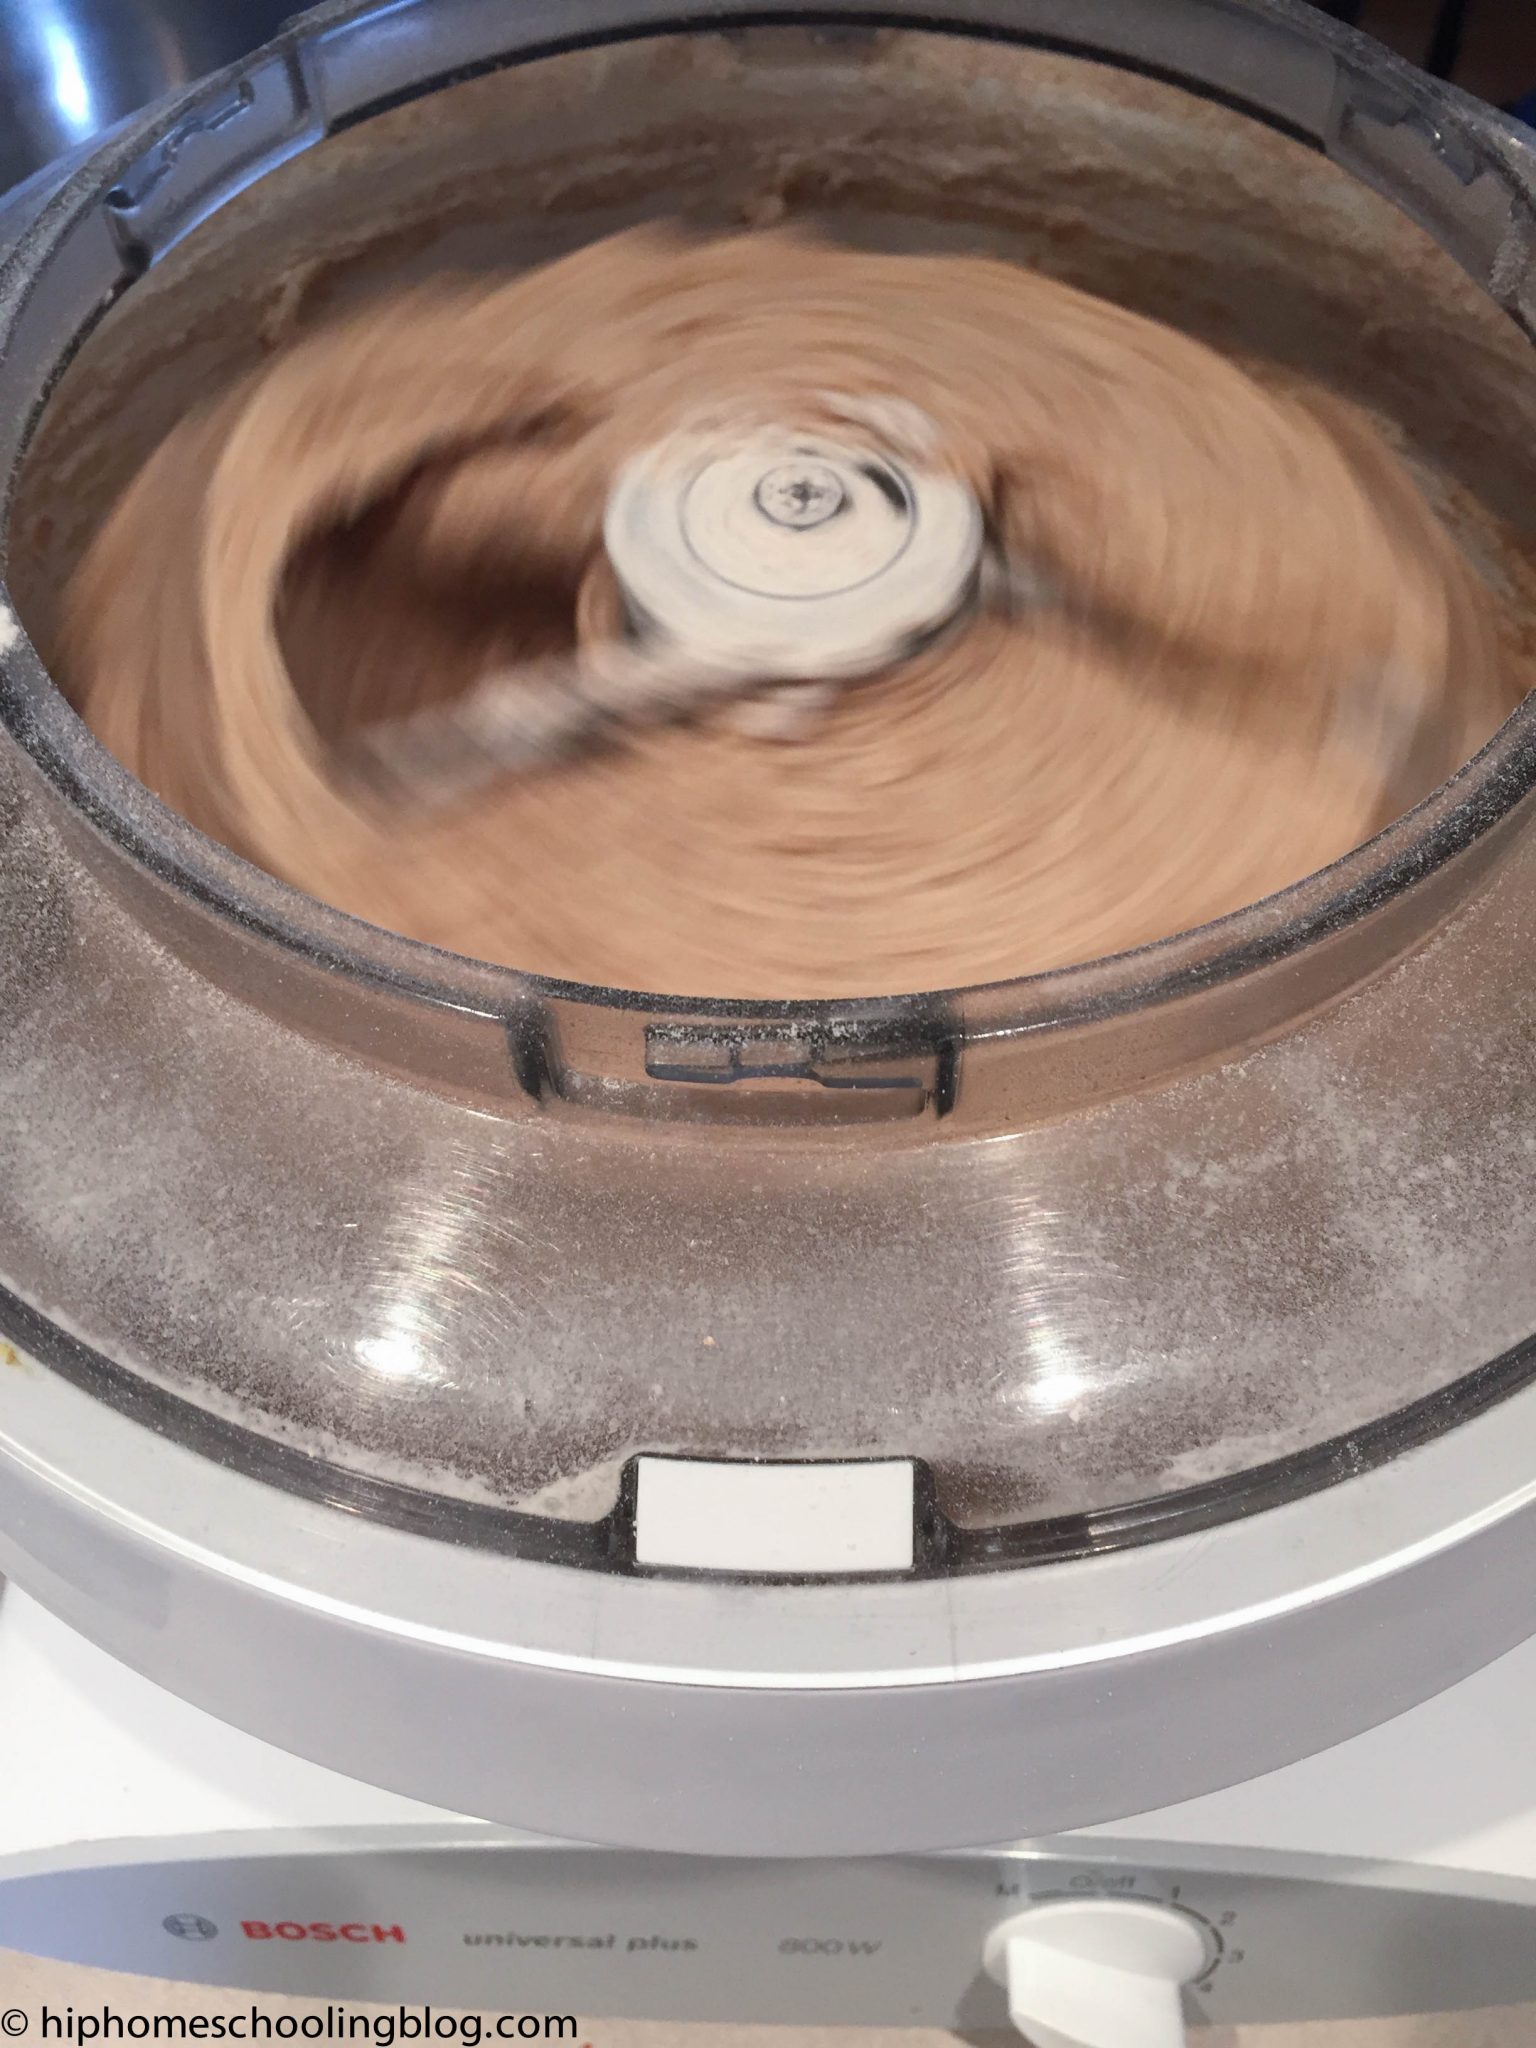
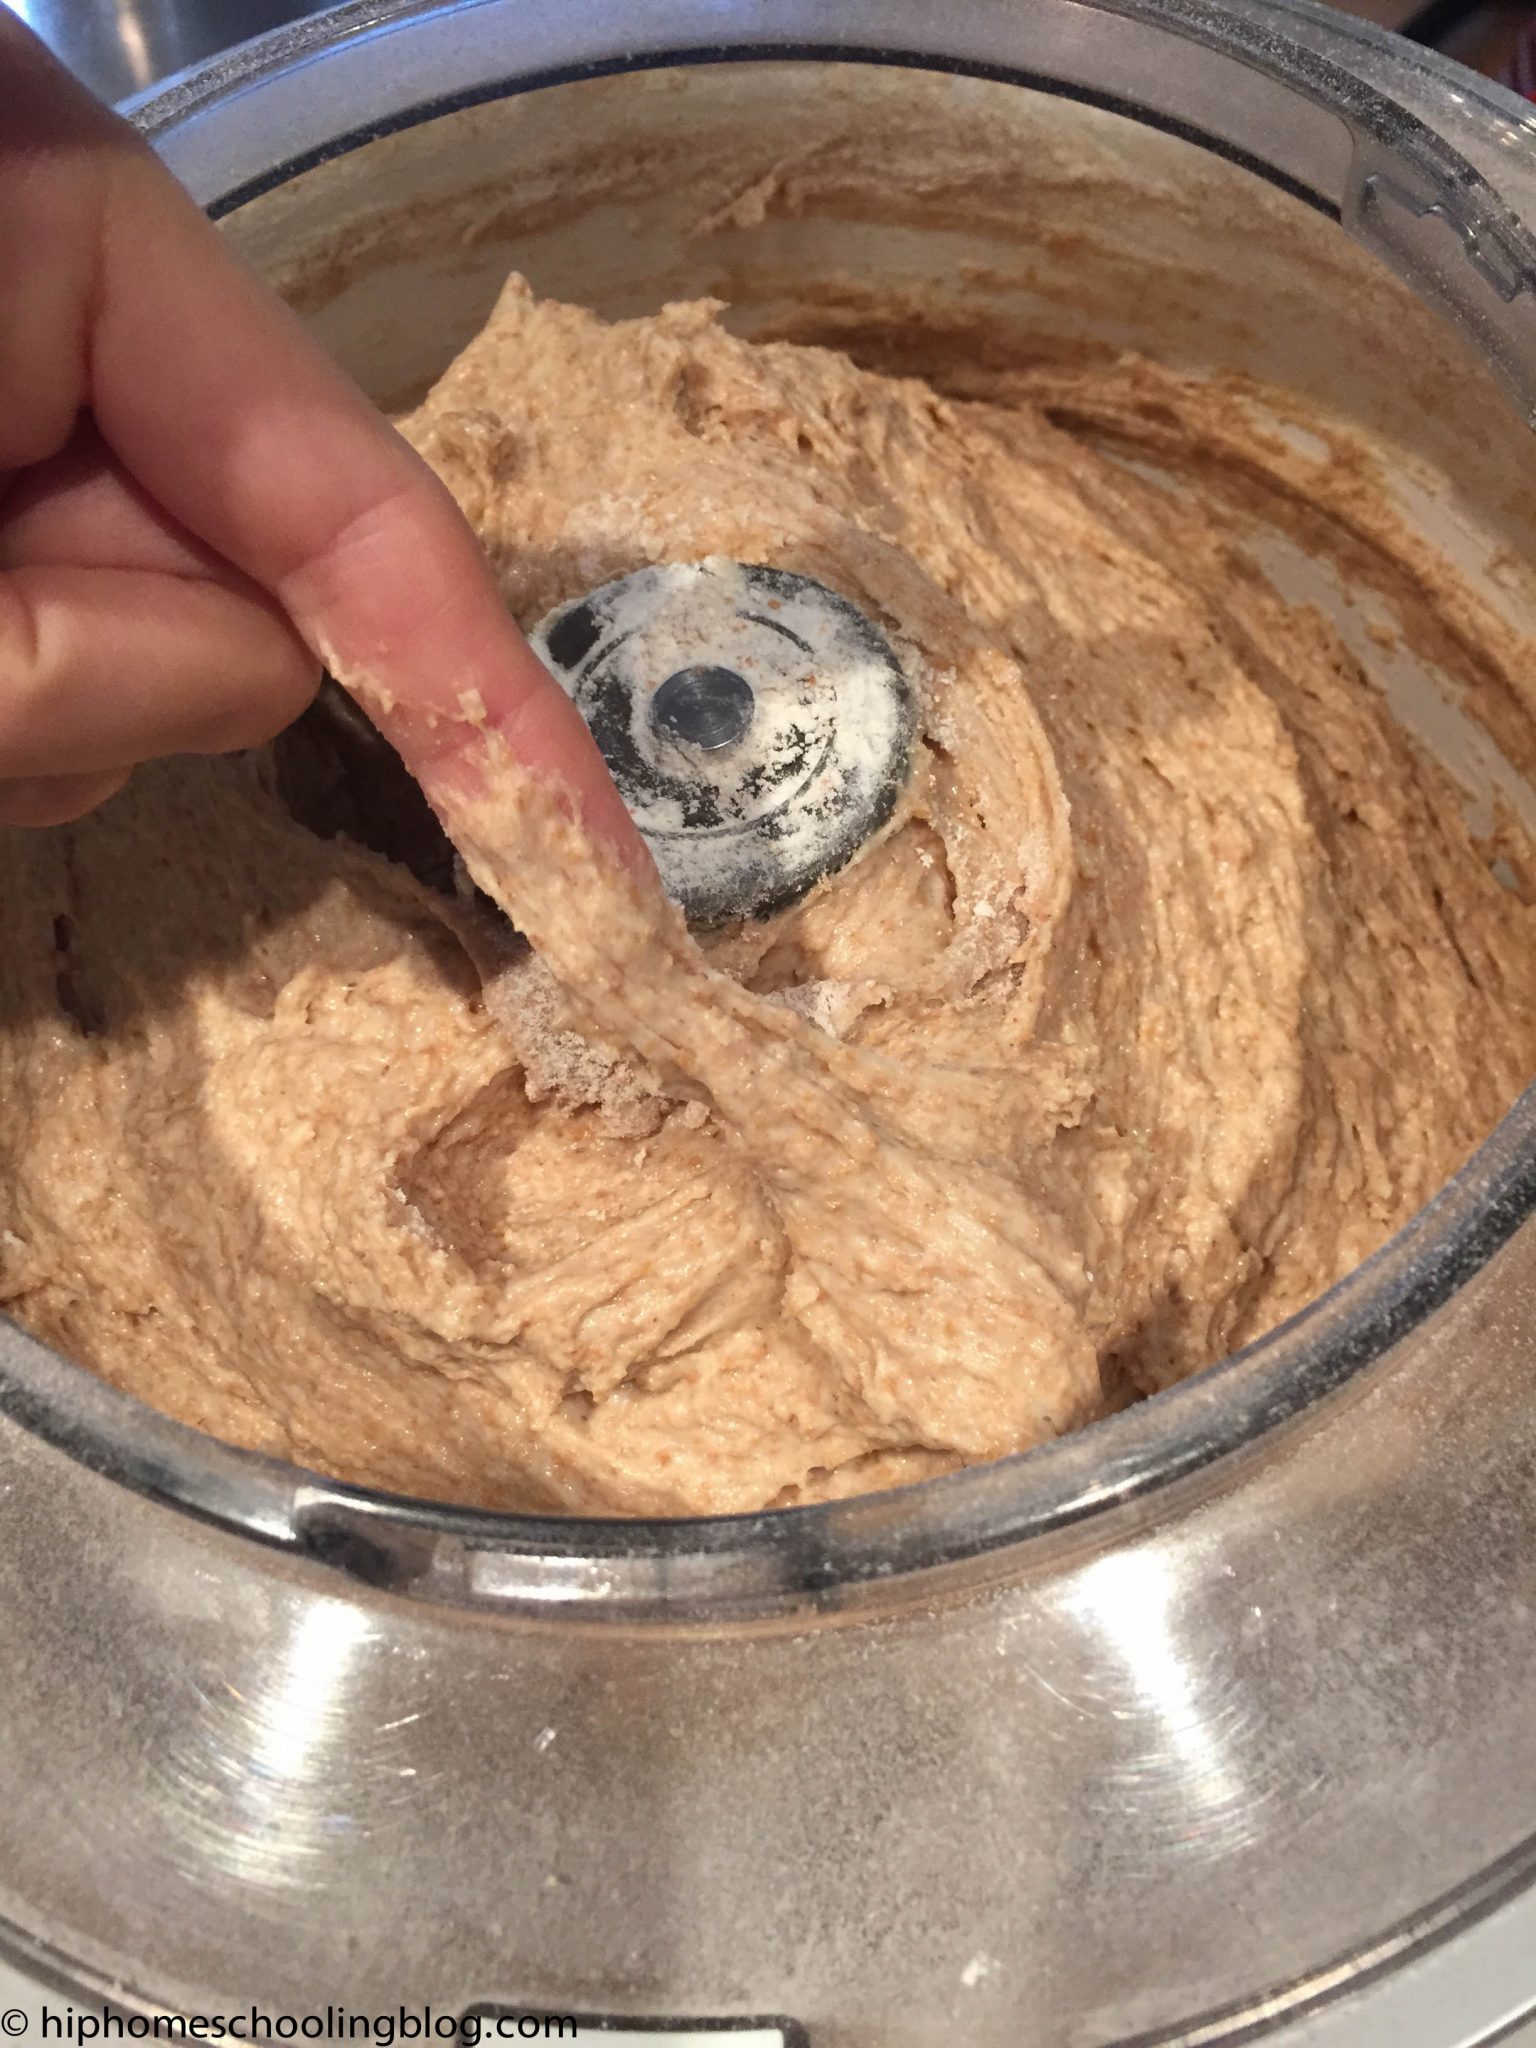
Once you have your ingredients (without the flour) in the bowl, you can go ahead and turn your mixer on. This FILLS the Bosch to the brim so if you have a smaller mixer, you may need to cut this recipe in half. Add your flour one cup at a time, you can mix in white or have it all whole wheat. Once the dough is starting to pull away from the sides, you can turn the machine off. Please note, I said STARTING. Unlike bread made from store bought or white flour, you want the dough VERY sticky, so it will not completely clean the sides. This is the secret to light, fluffy dough. Mine is so wet it just sags and it super hard to get out of the mixer, I took a picture of my finger pulling away the dough so you can see the consistency.
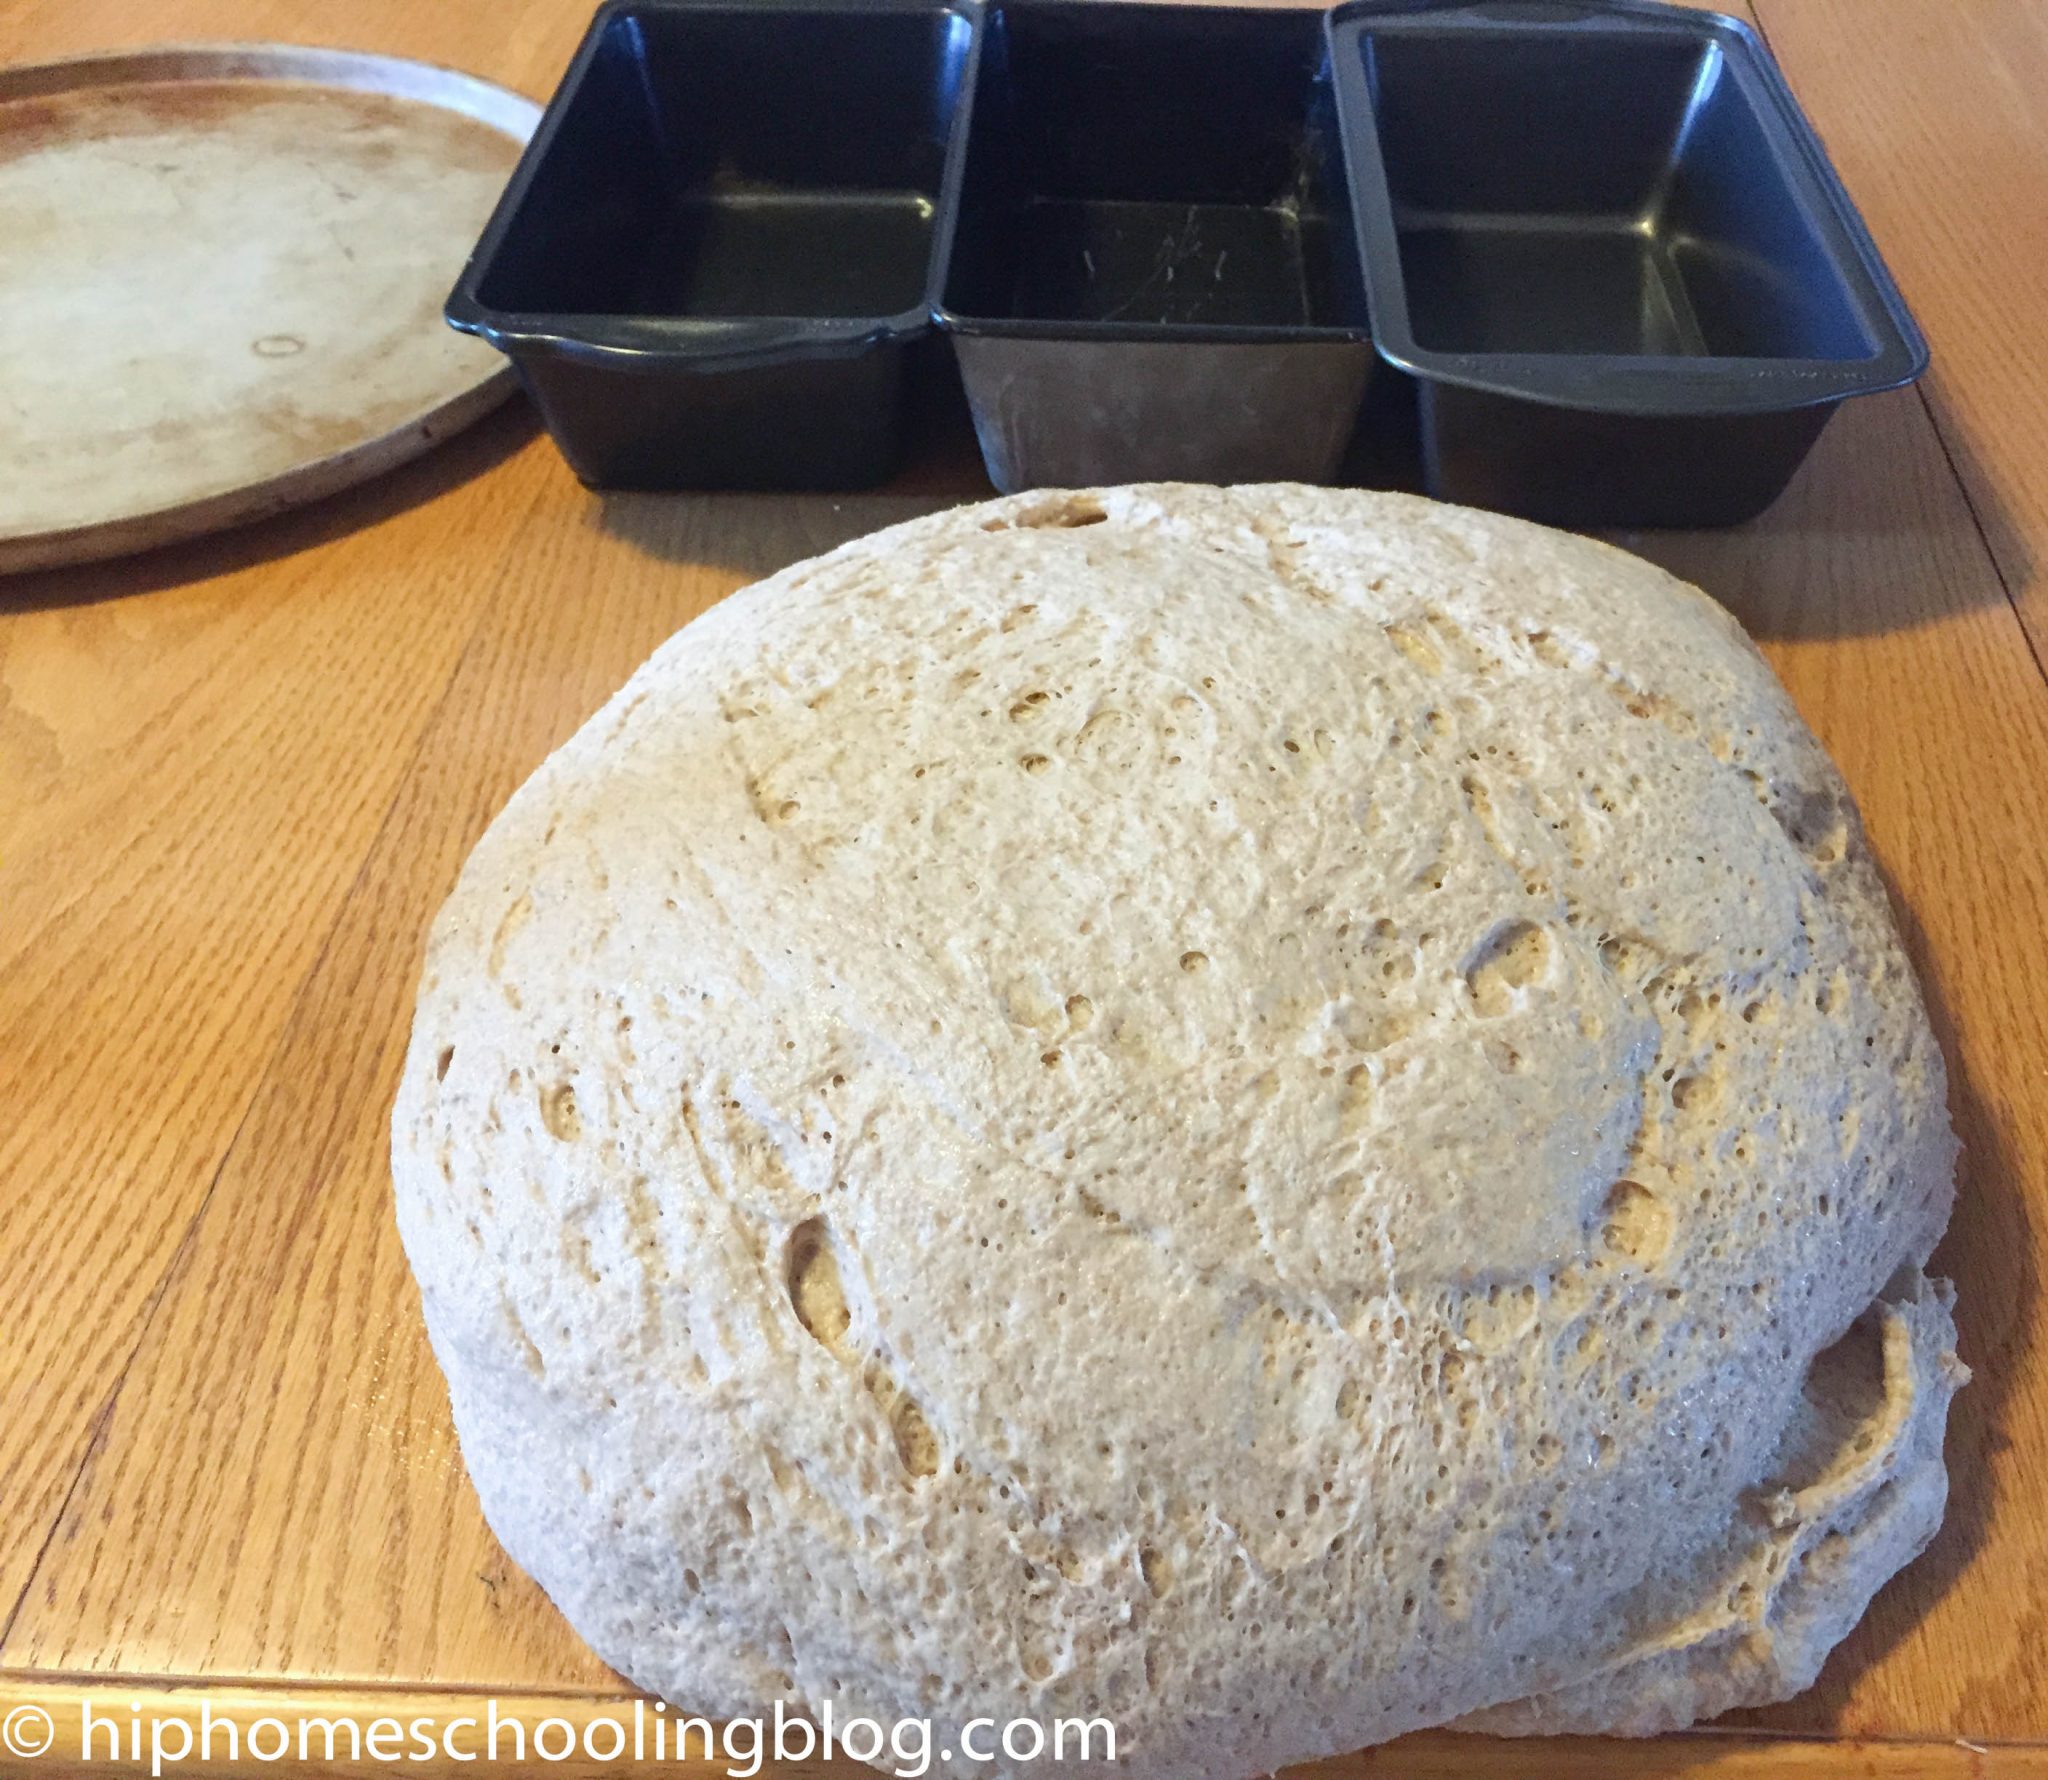
If this is your first time making this recipe, stick around! I let it rise for an hour the first time and it bubbled right up over the bowl, onto the floor. This is SUPER fluffy, happy bread. Now I let it rise for 20-30 minutes tops before punching it down and shaping my dough. The key is to watch for at least 1/3 rise before moving on to the next step. If you have a convection oven, you will be able to bake multiple racks of bread at the same time. You need to bake them as quickly as possible so that they yeast does not collapse. I am able to do this entire recipe without it collapsing if I base the timing on how much they have risen as opposed to the timer.

Whole Wheat Bread Recipe
- 3 Tbsp quick rise yeast
- 5 c. warm water
- 1 c. oil
- 1 c. honey
- 1 Tbsp salt (rounded)
- 2 Tbsp vital wheat gluten
- 1 c. warm milk
- 20 cups of flour (ish, stop adding when the dough starts to pull away from the sides of the bowl).Directions:
- Add all your top ingredients (except your flour) to your mixer.
- Turn on your mixer and start adding your flour cup by cup, waiting until it is mixed before adding another.
- Continue adding flour until the dough starts to form and pull away from the sides (starts to).
- Remove the dough, place into a well greased, extra large bowl and cover to rise until it grows about 1/3 the size.
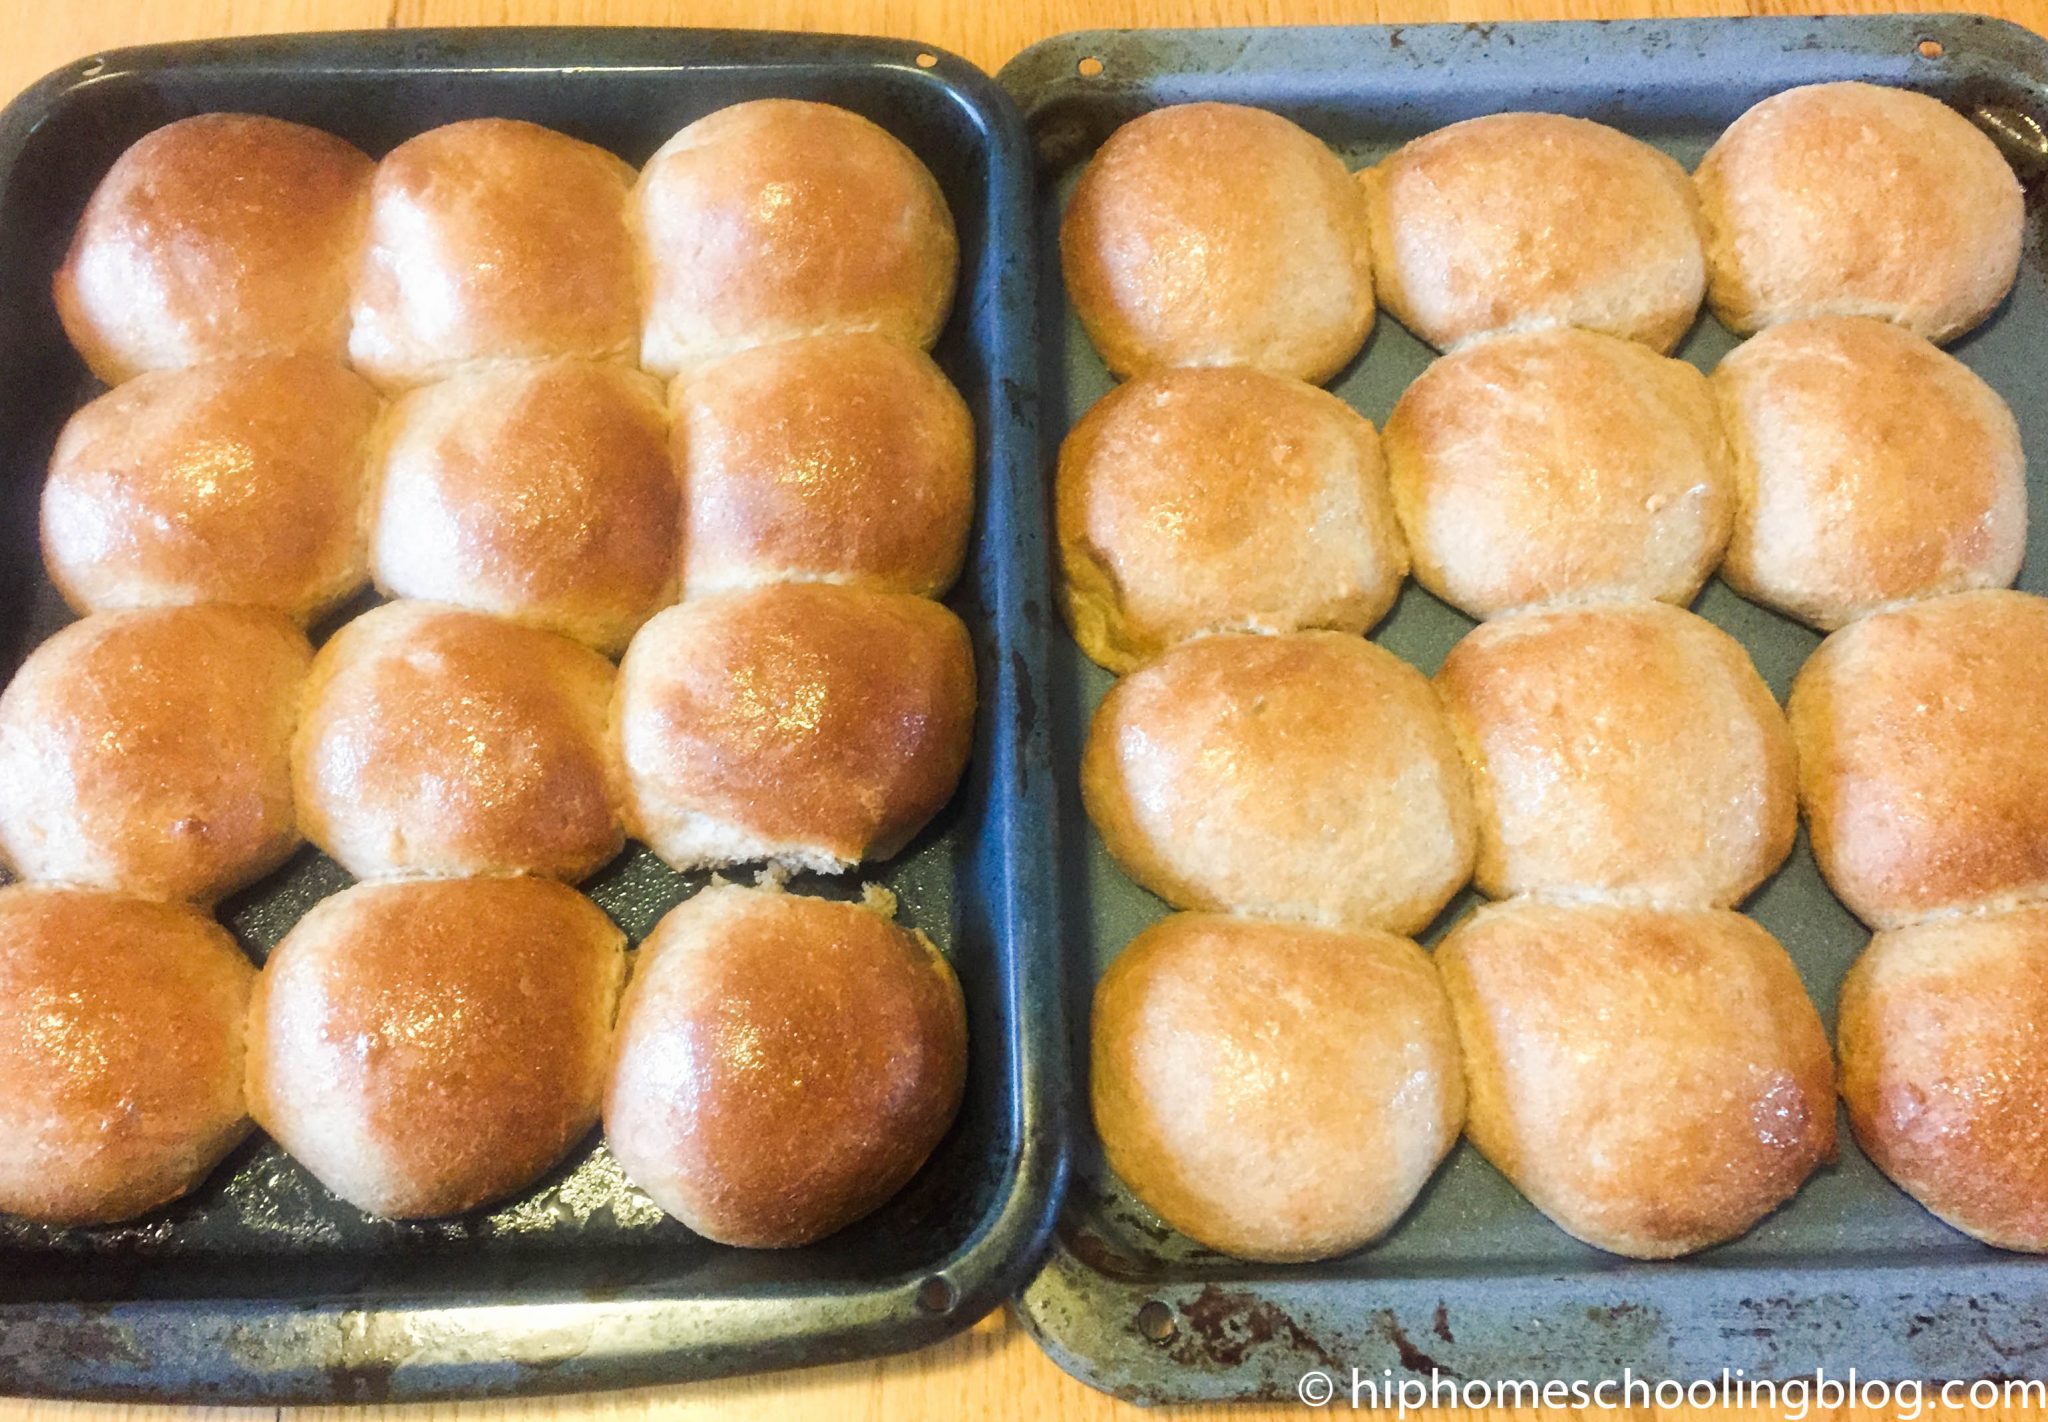
- Pound and shape your dough into buns/loaves.
- Cover and let rise for 20-30 minutes (or until they have nearly doubled in size) – preheat your oven when you are getting close!
- Bake at 350 (buns for 20 minutes, loaves for 30-40 minutes).
- Brush the tops with butter and store in an airtight bag or container.
- Enjoy!