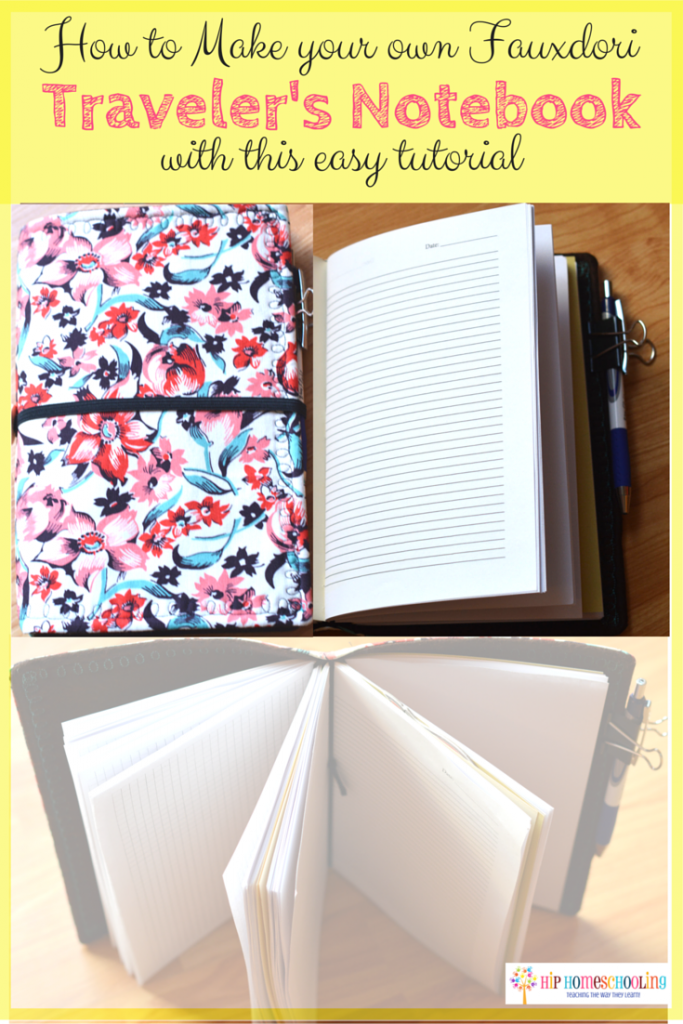
Do you know what a Traveler’s Notebook is? It is the best kept secret of the planning world… a way for your to organize all your thoughts and facets of your life into ONE PLACE, in a style that suits YOU… that you can re-use year after year! Sound too good to be true? In a nutshell, a Traveler’s Notebook is a folder that is held shut with an elastic that has multiple elastics up the INSIDE of the spine of the folder to hold multiple little “inserts” or booklets. Today I am going to show you how to make a fauxdori traveler’s notebook plus give you free printable inserts to go inside! But first, take a look at this short video showing you my Traveler’s Notebook.
I first heard about Traveler’s Notebooks on someone’s scope (if you aren’t on Periscope yet, stop what your doing and check it out… you get to watch and interact with people live, find me HERE) and was blown away. What WAS that? Could we just go back and stare at it over and over? I spent HOURS scouring the internet for more information–more videos and posts and pictures. I ended up getting one custom made and designing all my own inserts for it (which are available to you on my Etsy shop, Hip Homeschooling, HERE). Make sure to pin this tutorial for later!
PIN ME!
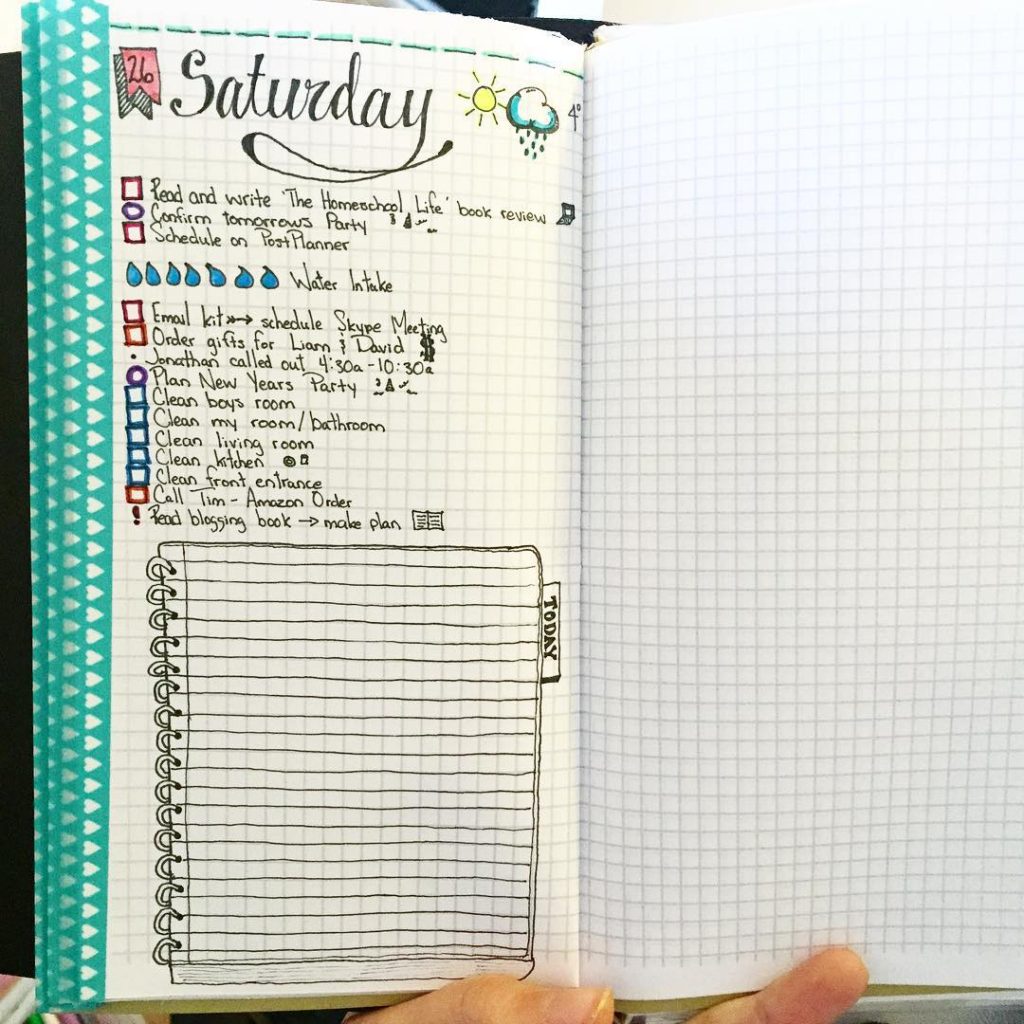
I was so beyond excited to have something that was custom taylored to my life. I needed a planner for my blog, a planner for my homeschool, a planner for my meals, a planner for my events, a planner for my to do list, a planner for my cleaning schedule… I had so many planners, all half-full and sitting on a shelf gaining dust. And, oh wait! I had to go buy them all over again in the new year! Now I have all my booklets made, I can just reprint new ones each month or every two months and put them in my notebook. I have all the information I need at my fingertips, and it is small enough to throw in my purse (bonus)! As a side note, I post ALL my planning pages for the day on my Instagram, HipHomeschooling, HERE. Here’s a sample page from my bullet journal (a post on that coming soon!).
When my kids caught the journaling bug…
Life was wonderful until my kids saw me sketching and planning and caught the bug. Now they all wanted their own, they were asking to (gasp) journal! They were even asking for a grid notebook to improve their lettering like I was (check out CreatviLei’s #31days to #loveyourlettering couse HERE). As a homeschool mom, I was DEFINITELY not going to pass up the opportunity to inspire my kids to write more! So I pulled out my sewing machine and whipped up a fabric Traveler’s Notebook for my 7 year old daughter, Selah. It took me about 30 minutes from start to finish, it is SUPER simple, you can add a clip to the side to act as a pen holder, or add a pen loop if you so desire as well. I am going to post the full tutorial below with pictures so you can follow along. I am also going to include 2 free printable inserts to go inside of them! And the great thing is, you’ll get a free monthly planner insert as well for your own traveler’s notebook!
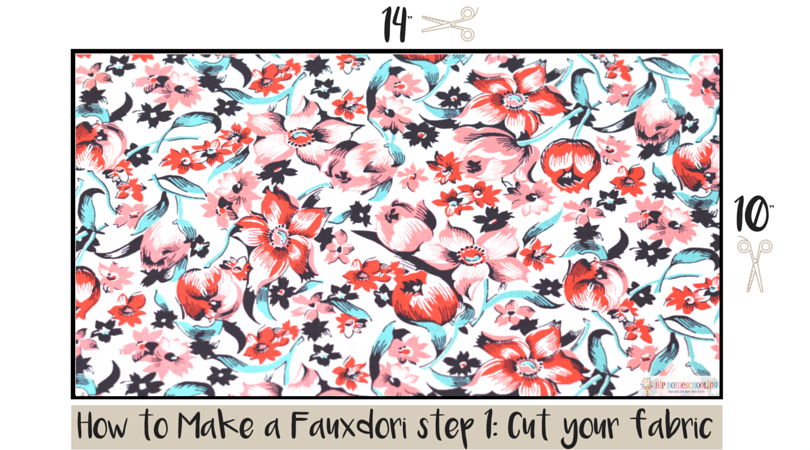
How to make a fauxdori step 1: iron and cut your fabric.
You will need 4 pieces cut all together. A front piece and an inside piece to your cover (or you can cut two of the same pattern for both the inside and the out) and two pieces of interfacing (the thicker/stiffer the better). You will need to cut all of them 14″ wide and 10″ tall. Here’s my fabric rectangle cut out with the cut lines in case you need a visual.
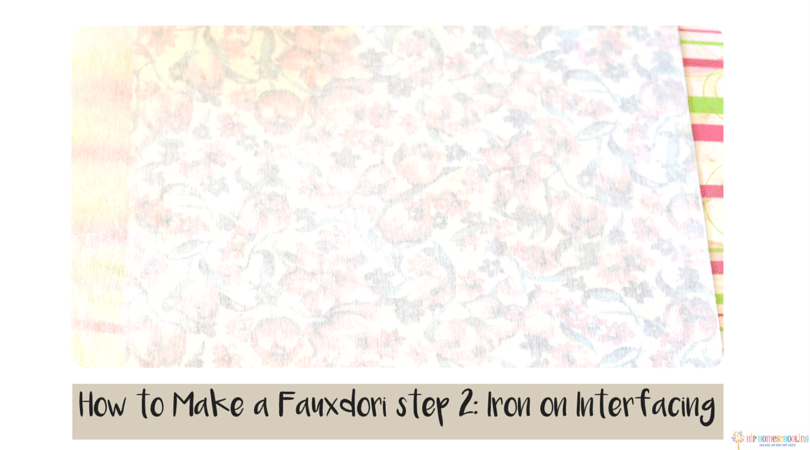
How to make a fauxdori step 2: Iron on your interfacing.
Now that you have your pieces cut, you want to iron on your interfacing. I generally start on one side and work my way across the strip, swooshing (yes, that’s a word) from top to bottom. I use the steam setting on my iron and it fuses together nicely. You will repeat this step for both the front piece and the inside piece, fusing it to the backside of the fabric.
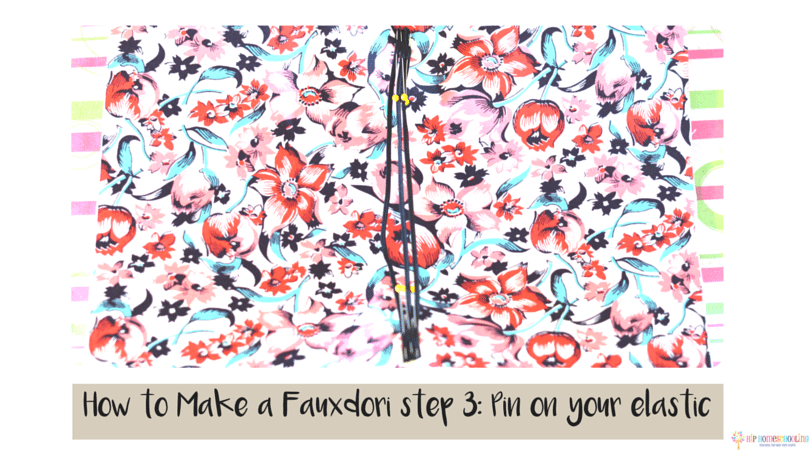
How to make a fauxdori step 3: Pin on your elastics.
You are going to take your top piece and pin on the elastics. How long you cut the elastic really depends on the stretch of your elastic. If your elastic is really tight, cut it to the same height as your fauxdori. If, however, like me your elastic is loose, you will want to cut it about 2″ shorter (8″). My elastic was SO loose that in the end I still tied a little knot in the middle of each one to hold the books in better (live and learn, right?). I chose to put 3 elastics in my spine, though you could easily to 4. You want to stretch them to about 1/4″ from the top and bottom and pin them in place, side by side. I made a mark in the middle of my book and put the middle one right on top of it, then put my other two elastics directly beside. Take a look at my before shot.
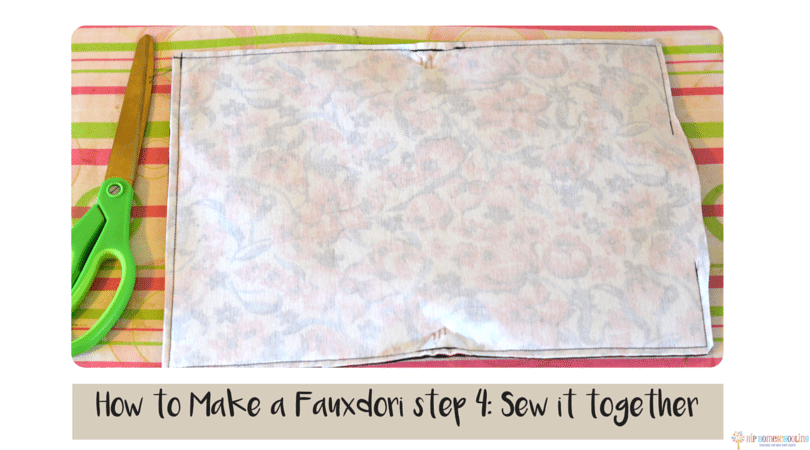
How to make a fauxdori step 4: Sew your pieces together.
Now you get to put it all together! lay your outer and inner piece right sides together, please note you can pin your pieces or just stretch them by hand. I like the freedom of stretching as the fabric is being pulled by the elastics, but you could pin it securely in place. You will sew 1/2″ from the edges all the way around leaving a 5-6″ gap in one of the sides of the book to turn it right side out. When you get to your pinned section, I left my pins in because of the way they were pinned (far enough down that they didn’t touch my needle). Note that I went over the spine elastics about 6 times back and forth to secure them inside.
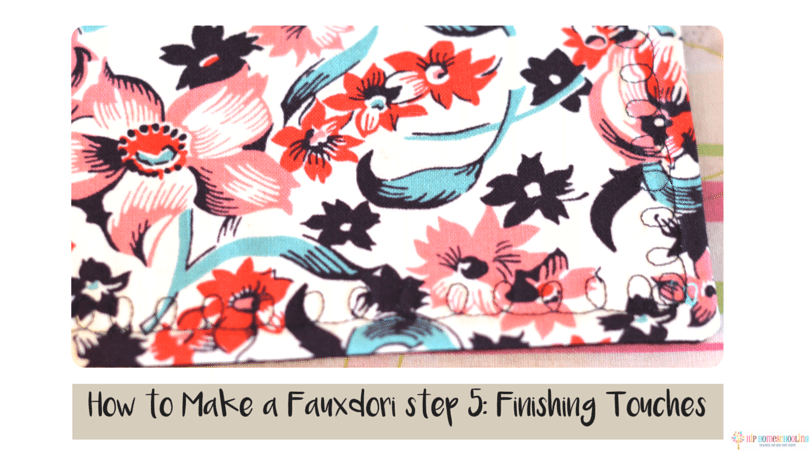
How to make a fauxdori step 5: Trim, turn right side out, iron and top stitch.
Trim your edges and cut your corners, this is important or else it will be super bulky and won’t iron out nicely. Turn your fauxdori through the hole you left, use a crochet hook to push out your corners. Fold in your hole, flip your elastics to the inside of your fauxdori and iron the top well. You can do a simple top stitch, 1/4″ from the edge or a fun one, it won’t effect the function of Traveler’s Notebook.
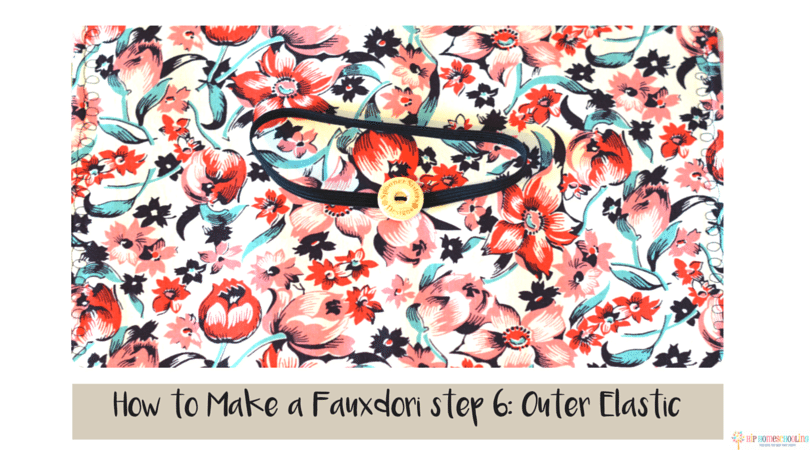
How to make a fauxdori step 6: Add your outer elastic.
This is SUPER easy guys. I used a tighter elastic for the outside so I cut it to the same length as my finished book was around… about 12″. I attached it on the spine with a button, I sewed through it two times, 16 stitches each round so it was firmly attached. Make sure you attach it so it sits nicely on the book and don’t forget to move your elastic on the inside of the book aside before you do!
And that’s it guys! You did it! You made your own fabric Traveler’s Notebook in 30 minutes! You can add a pen look before you se wit all together, you can do a bunch of customization, but this is a super simple way of setting one up. And the great part is, it is extra wide. It PERFECTLY fits an 8.5×11″ piece of paper folded in half… which means less work for setting up your inserts!
Get your FREE graph and journalling inserts for your new Fauxdori here!
And there you have it! I have two booklets for you, we use three books in ours. 1 blank paper booklet, remember just regular printer paper folded in half works great, use a piece of cardstock as the cover and let the kids decorate it if you want! To print off a graph booklet for your kids, the easiest way is to set up and print off your own grid paper double sided, than just trim and staple your booklets. You can do that here.
The one my kids are really enjoying however, is my 60 page journalling insert. This is just a lined insert, set up on two pages and designed to print double sided. All you have to do is set it up as print–> booklet –> binding: left and your good to go (you need to have it opened up in the free Adobe PDF viewer to have those options). It’s a lot simpler and has a date at the top so your kids (or you) can keep track.